Disclosure: This post contains some affiliate links. I may earn a small commission at no extra cost to you, supporting my blog and content creation. Thank you!
---
Every now and then I receive requests for my sculpting kits, which I discontinued a couple of years ago due to the cost of procuring the items. While I can no longer offer the kits, I wanted to share something even better with you – a compilation of my favorite materials and tools. With this guide, you can create your own personalized kit and embark on your sculpting journey with confidence! Pair it with one of my sculpting books, and you're ready to unleash your creativity like never before!
Armature Essentials
Let's start with the foundation—the armature:

-
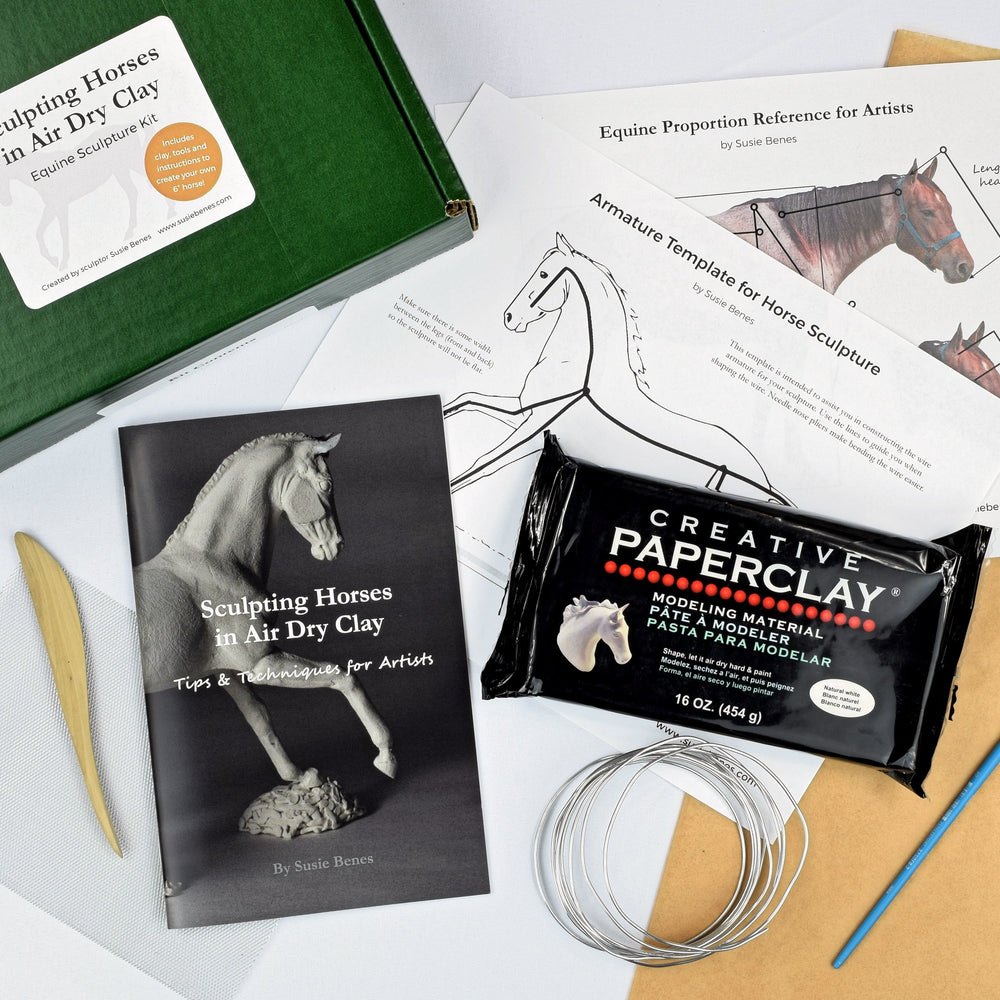
Wire: My go-to is aluminum armature wire, available in various gauges. Depending on the size of your sculpture, I find the 12 gauge ideal for pieces standing 6 inches or taller. For more armature options, you can dive into my wire guide for air dry clay sculpture.
-
Pliers and wire cutters: Essential for working with wire. I like the ones that combine both tools together (note the spring that helps them pop open after use).
-
Wire Mesh: A game-changer for sculpting delicate areas like horse tails and animal ears. I exclusively use Amaco Wireform, designed to be both flexible and robust for artists. Although there might be other options, this is my top choice for its easy shaping and cutting with regular scissors. I prefer the smallest diamond pattern (1/16") but there are many to choose from. Wire mesh sold in hardware stores is something very different. It can be challenging to find online; I buy mine from the local art supply store.
-
Glue: Glue is a sculptor's best friend, and there's a myriad of types for various purposes. I've compiled an entire blog post on the topic of glue for sculptors to help you select the right one for your needs.
-
Wood: When the armature isn't visible, don't limit yourself to wire. Popsicle sticks or dowel rods can serve as sturdy alternatives when firmly attached to fortify your armature.
-
Extruded Polystyrene (XPS): An excellent lightweight material for large sculptures, making it perfect for floor-standing creations. I typically get a sheet at the hardware store when I need it, but you can get it online in smaller quantities. You can also use Styrofoam, but I find it much messier and not as dense.
Explore the Clay Realm
Next up—the clay:

-
Creative Paperclay: Let me spare you a lengthy explanation and direct you to my blog post where I sing praises about this air dry clay for sculpting at home. If you're eager to get your hands on some, you can find it here.
-
Epoxy Clay: A must-have in my sculpting arsenal. My personal favorite is Apoxie Sculpt, available in a range of colors and boasting a delightful texture. In the past, I've used Apoxie Clay, which has a matte finish, but I've been infatuated with black lately, which Apoxie Sculpt offers.
-
Ziplock Bag: Don't forget this practical essential for storing unused clay!
Sculpting Tools of Choice
Ready for sculpting? Gather these helpful tools:
-
Wood Tools: The market offers countless varieties, but there's something about this one that keeps me reaching for it repeatedly. I also like this Kemper tool. If you're new to sculpting, consider investing in a comprehensive modelling tool kit to find the tools that resonate with your artistic soul.
-
Pin Tool: A versatile tool I frequently use in both air dry clay and ceramic sculpting. I prefer the all-metal variant for this task.
-
Paint Brush: Ah, my absolute go-to-tool! Small paint brushes work wonders for detail work and clay manipulation, especially in tight areas. I find filbert-shape brushes to be the best, as they leave minimal marks in the clay.
The Art of Decorating
Time to embellish and elevate your sculptures:

-
Gesso: My preferred brand is Golden, and I use both white and black variations based on the sculpture's final color. If you're curious about why I do this, check out my post about the significance of priming air dry clay sculptures.
-
Paint: My love affair with the Golden brand continues here—I rely on both heavy body and fluid acrylics, depending on the desired effects. For additional options, Holbein's Acryla Gouache paints are splendid. For those starting out, student quality acrylics are budget and beginner-friendly. I myself am a big fan of Liquitex basic paints as they have good pigmentation.
-
Varnish: I can't help but favour Liquitex Satin or Matte varnish, but I recommend Golden MSA spray varnish for hard to brush pieces. Check out this post on why you should varnish your air dry clay sculptures.
-
Mixed Media Elements: Here's where you let your creativity run wild! Mini paper flowers (hot tip: you can paint these too!), ribbon, leather, thrift shop treasures—the possibilities are limitless.
Finally, one last item I recommend for the home sculptor, is a self-healing cutting mat. These bad boys are a must-have to protect your surfaces (especially if your dining table doubles as your workspace), and prolongs the life of your X-acto blades.
Book Your Sculpting Adventure
Finally, let's talk about knowledge and inspiration:

-
"Sculpting Horses in Air Dry Clay": An excellent introductory book to ignite your sculpting passion - especially for horse-lovers.
-
"Exposed Sculpture: Creating Animals in Wire and Clay": Combine wire and clay to create unique works of art.
With this carefully curated list, you have the power to assemble your personalized sculpting kit—a delightful gift for the creative soul in your life. Keep in mind that this list is by no means exhaustive; it's merely intended to simplify your journey into the captivating world of sculpting. Embrace your artistic endeavours with enthusiasm and watch your sculpting dreams come to life!
What's Next?
Learn how to create a solid armature
Discover the secrets of sculpting with Creative Paperclay