Disclosure: This post contains some affiliate links. I may earn a small commission at no extra cost to you, supporting my blog and content creation. Thank you!
---
While the questions from earlier in the sculpting from home series can help you to create a framework to think about your artist practice as it relates to materials, it’s also important to consider the space you will be sculpting in. If you're working within a confined area, it's probably not practical to dive into creating a life-sized elephant out of old bedsheets.
We all dream of the perfect studio, a dedicated space where the seeds of our creativity can sprout without any hindrance. However, reality is often a bit more restrictive. Especially for those of us in small apartments with limited budgets, the ideal studio might look like a corner of the living room or a seldom-used table in the kitchen. We must get creative with our spaces as we do with our art.
As a sculptor, at the very least, you need a surface to work from. This could be a table, a desk, or even a wooden board placed on the floor. Your studio setup will, of course, differ based on your chosen medium and its specific requirements. To help guide you, I'm going to propose several general studio guidelines for small spaces that I found helpful when I first started working from my tiny apartment.

What I wished my studio was like - look at the space!
Before we get into the nitty-gritty, bear in mind that sculpting can be damaging to surfaces. So, avoid rushing out to buy a beautiful live-edge desk to get into the "creative mood." What you need is a surface you aren't afraid to make a mess on or at least one you can adequately protect. If you're continually fretting over scratches on your grandma’s antique table, it's going to be a tough ride into the "flow state" of your creative process.
Questions to consider when setting up your home studio space:
- Does it have adequate lighting?
- Where can I place a work surface? Will it be permanent or temporary/mobile?
- Do I prefer to sit or stand while I work?
- Can I ensure this space is quiet and free from distractions?
- Where can I store materials and/or finished sculptures?

A Tiny Studio Set-Up
For those with extreme space limitations, the dining room table or kitchen island might be your only option. It’s there, and often unoccupied. However, having to clear away your sculpting project every mealtime can deter your creative momentum. Being able to sit down and start working is often stated as the biggest barrier to making art (and excuses to not make art will abound, trust me). Having to take out and put everything away again can block the impetus to start making. To overcome this, consider getting a wood board from the hardware store to use as a portable workspace. It's a flexible solution that allows you to move your work as necessary, even taking it outside. Plus, it helps protect the surface underneath. When you're done, you can simply slide it under your bed or behind the sofa for storage.
If a board is not an option, at the very least you should put down a plastic table cover to protect the surface or a plastic mat. Consider it a part of your ritual to set-up your work area to help you get into the creative mindset.
 The reality of what most home art studios look like.
A Small Studio Set-Up
For the fortunate ones who can dedicate a desk to their sculpting, remember, your space doesn’t have to be vast. A small table in an extra closet, under the stairs (remember Harry Potter), in the garage, or in your basement can do the job just fine.
My earliest home set-up was a 6ft long, but basic IKEA desk, cheap enough that I didn’t worry about damaging it. The desk also housed my computer, where I did all of my digital tasks off on one side. Having a clear distinction between my digital and physical workspace proved essential, helping me channel my thoughts based on where I sat.
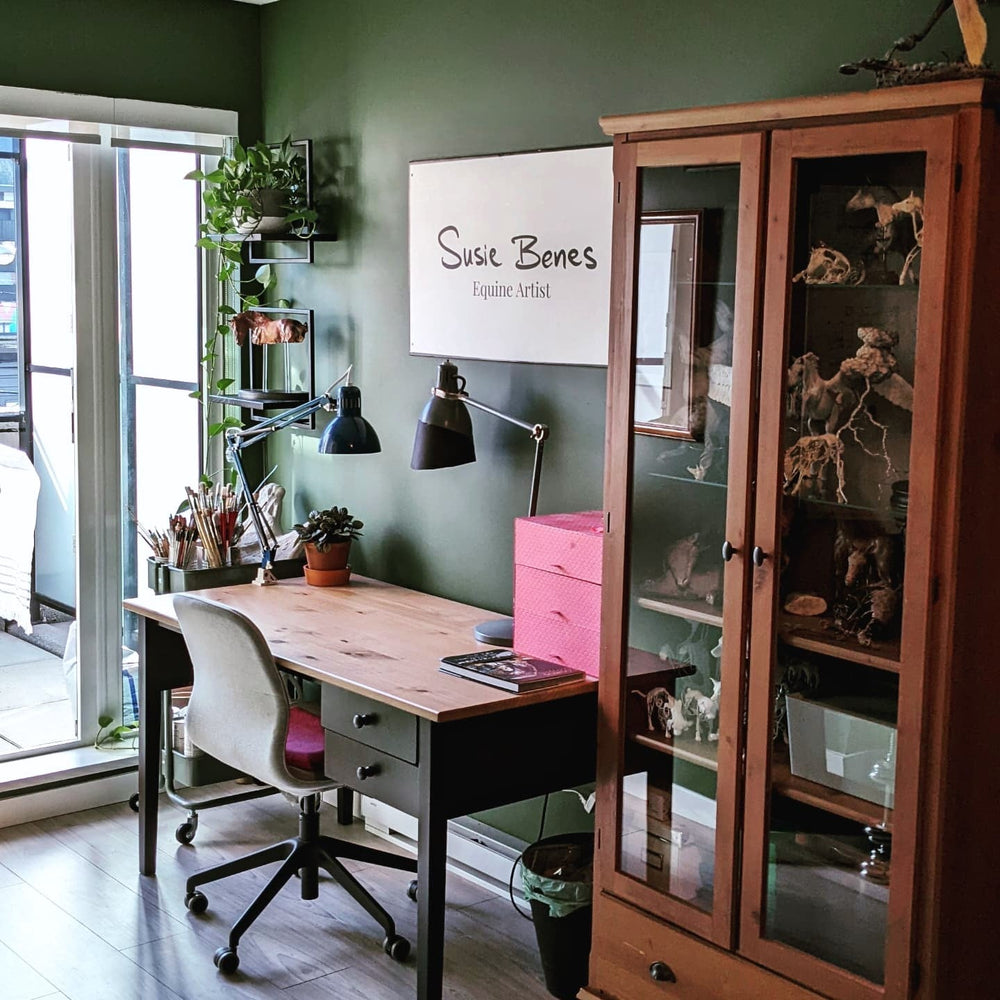
A Medium Studio Set-Up
Once you have more room at your disposal, consider upgrading to a full, separate desk for your art-making. This makes a big difference in not only the amount of space you have, but also the amount of mess you can make (without fear that you’ll splatter your computer with paint for example). My current setup includes a small rolling utility cart for my materials. It has been a game-changer, offering easy access to my supplies, and I would highly recommend purchasing one if you need lots of different tools on hand.

Let the Light In
Having a well-lit workspace is crucial. A good bulb can make the difference between a pleasant session and a headache-inducing one. I always buy full-spectrum daylight LED bulbs. They don't heat up and fit into standard bulb receptacles. I recommend an adjustable arm work lamp with a good bulb. If possible, have two lamps to light both sides of your work effectively and eliminate harsh shadows.
Pay attention to the “temperature” rating (aka Kelvin) of bulbs. Warm lights around 2700K are very yellow; cool whites are around 3500K; and finally, daylight is around 5000K. My favourite brand is OttLite, as I find their daylight bulbs are not as harsh white as some other brands of daylight.
The added bonus of having a good bulb for sculpting is you can use it when you photograph your work (I'll cover this later in the series). So, invest in a good bulb or two.


You might also have the option of taking it outside.
Now that we've addressed where to sculpt, it's equally important to consider where we’ll store our materials and finished pieces. An organized storage system is essential to maintaining a productive and clutter-free studio. You don’t want to be searching for hours for your materials when inspiration strikes, or worse have your precious creations jumbled up in a corner.
What's Next?
Explore some home studio storage solutions for sculptors