This is a follow up to the first post on the subject of armatures for air dry clay. In this article, we'll look at how I approach the anatomical aspects of my air dry clay equine sculptures.
If I find myself dissatisfied with one of my sculptures, it often relates to anatomy: the tail is not in the right spot, or the front legs are too far under. Something just doesn't feel right overall.
I'm not after conformational perfection, but as a rider and horse-lover, the anatomy is important in my work. If it is off by too much, I find it interferes with the visual impact of the sculpture.
Armature Anatomy - right from the start
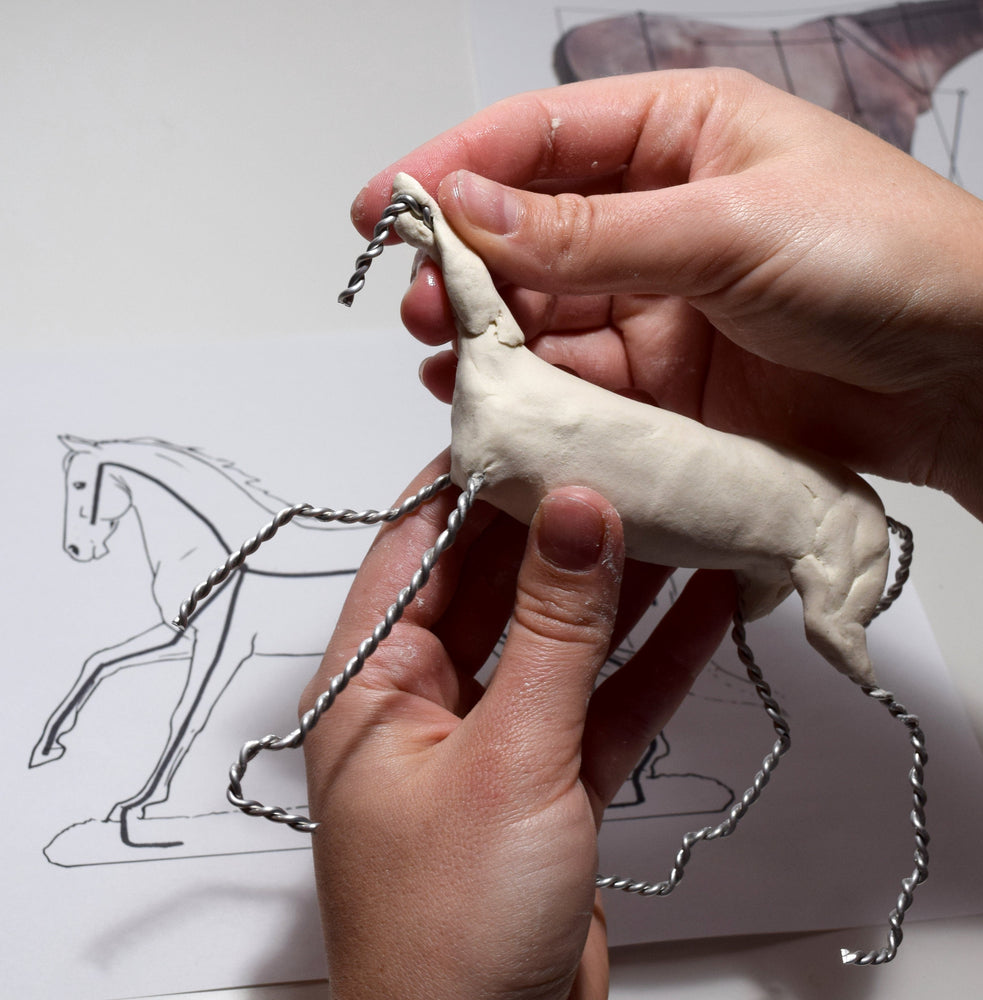
An armature locks in the proportions from the very beginning, so it can take effort to get it right. It can be difficult to measure them out beforehand because you're essentially building the sculpture from the inside out.
It is helpful to study the equine skeleton to understand how the bone structures come together and to build the armature accordingly, e.g. the slope of the shoulder is mimicked in the way the wire is bent.

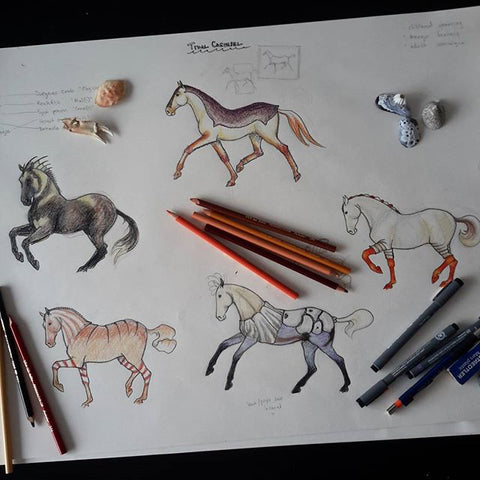
The image above hangs in my studio for anatomy reference and I made for myself. It is super helpful. I actually include such a reference in my Sculpting Horses in Air Dry Clay Book.
I use a caliper or reference stick (usually just a thin wooden dowel) marked with the length of the head and then use it to measure the other parts such as legs and girth to ensure that the horse’s appearance is consistent throughout.
Sometimes I play with anatomical features, such as making a foals legs longer, to play with form and experiment with ideas, but generally I try to be relatively accurate to life.
Sketching
I don’t generally make complex 2D drawings before getting to work. I find that translating something that started off as 3D in my head into 2D and then back again is a pain. I do sketch ideas, but I do not like to tie myself down and usually let the sculpture "tell" me how it wants to develop.
Maquettes
Once I gather, physically and mentally, the reference materials I need (I uses multiple pictures to help with positioning of the joints and muscling), I sometimes make a maquette: a small study or 3D model of the larger sculpture. This method helps to define the final form, and provides a useful 3D reference when sculpting.

If I’m working on a small sculpture, I generally skip this part, though sometimes I may make several versions of the same thing before I’m satisfied. When I was making the "Foals Rush In" series, I threw out a considerable number of foals before I was able to arrive at something I liked.

Bulking Out the Armature
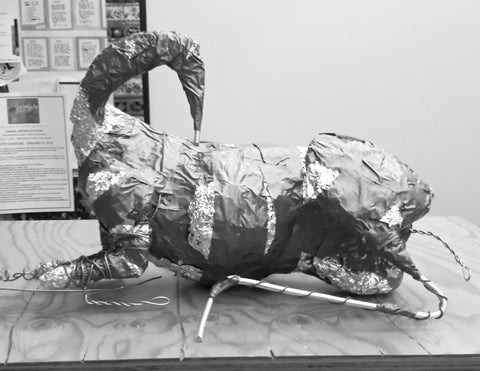
Finally, I bulk out the sculpture, usually using aluminium foil, to keep the whole thing as light as possible. Adding too much armature material can cause problems once the clay is put on top. Sometimes it’s better to use more clay, which can easily be removed, rather than trying to cover an exposed armature.
Strong Armatures Make Strong Clay Sculptures
This is especially true for air dry clays, which require time to dry to achieve maximum strength. The payoff for all the work on the armature is a sculpture that is not only strong and anatomically truthful, but also wonderfully lightweight (as compared to a same-sized sculptures in traditional materials).
What's Next?
See an air dry clay sculpture made from start to finish
Start sculpting in air dry clay with my horse sculpture book