Finding time for sculpting can be challenging; I speak from experience. It's not just the act of sculpting itself, but also the many small pieces that need to come together for a successful sculpture project. In an effort to streamline this process, I've developed a plan that has been incredibly helpful for me, and I believe it could be just as beneficial for others.
Before diving in, you'll need to gather your sculpting materials, which should include wire, clay, and some basic sculpting tools at the very least. If you're new to sculpting or need to refresh your toolkit, I've previously shared a blog post on creating your very own sculpting kit, which might come in handy.
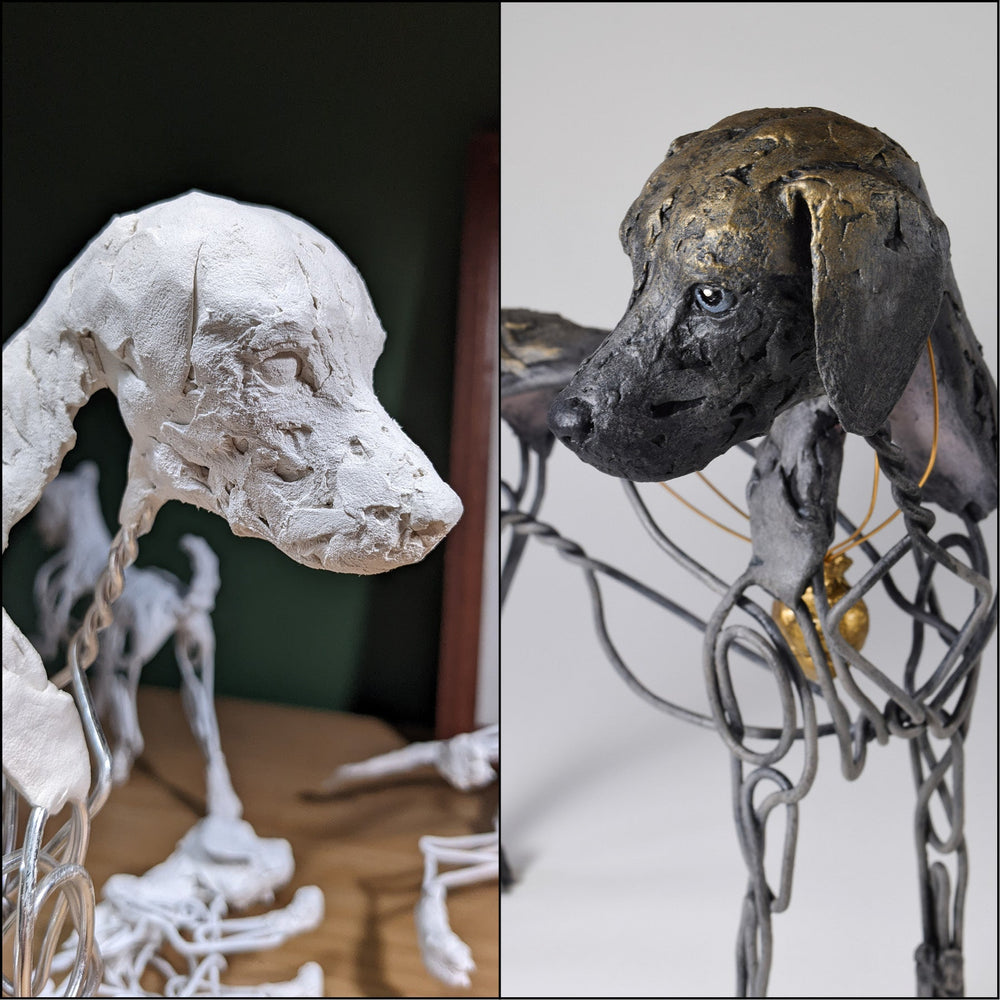
Obviously, a 3-day sculpting timeline might not be for everyone or for every project. This breakdown is more to show you how it might help to organize your tasks and materials. Larger sculptures will generally take much longer due in-part to the amount of clay that needs to be added and dried. I think a sculpture up to 6in tall is realistic to accomplish In this timeline. Depending of course how fast a sculptor you are 😉

Friday Evening – Armature Building (1-3 Hours)
Materials Required: Armature plan, wire, needle-nose pliers (optional), clay (optional)
Day’s Goal: To create an armature ready for your clay creation
We begin by creating a plan for the sculpture, which will serve as a guide for mapping out the placement of the armature. You can either use one of my pre-made armature plans as a template that I provide with my books for free. Alternatively, you can find (or draw) an image of what you wish to sculpt, and use that as a way to map how you’ll shape the wire to create your artwork.
I’ve said it before and I’ll say it again, the key to a successful air dry clay sculpture is ensure that the armature is very sturdy. When adding wire to other wire, ensure you wrap it very securely so you minimize movement. The more secure your armature, the stronger your sculpture will be and the easier it will actually be to sculpt. Hot tip – I like to secure my armature with epoxy clay so I know it won’t move, but you can use some of your air dry clay or hot glue to make areas where wire is joined less flexible.
Resources you may find useful:
Explore different types of wire suitable for your project

Saturday – Sculpting (3-6 Hours)
Materials Required: Air dry clay, a rag, a bowl of water, sculpting tools
Day’s Goal: To have a finished (not necessarily completely dry) sculpture in air dry clay
If your sculpture is large, or has a “chunky” section, you can bulk out your armature with aluminum foil to save on the amount of clay you need to use. That said, I aim for at least 1 cm (around 3/8 inches) of air dry clay thickness to ensure rigidity and strength, so if your piece is on the small side, don’t be afraid to use only clay.
Begin sculpting your masterpiece. Depending on the size and complexity of your sculpture, you might be able to work on it all at once. Alternatively, consider working in phases, sculpting sections and then allowing them to dry. Drying my sculpting periodically helps me to work more effectively because the air dry clays I use are not as stiff as ceramic clays.
During the drying phase, place your sculpture on an aluminum foil-lined baking tray and put it in the oven for 20 minutes at the lowest temperature (usually 175°F). You may need to repeat this process several times for sculptures with thick clay applications. Let it cool before continuing work.
You can do the drying phase repeatedly, just remember to not heat it too much or for too long, you might singe the clay. Once you’ve finished sculpting, you can do a drying phase, and then leave it to dry overnight in a dry, well-ventilated place.
Resources you may find useful:
Not sure which clay is best – here are some tips
How to know when air dry clay is dry
What to do if air dry clay cracks

Sunday – Decoration (2-5 Hours)
Materials Required: Gesso, paint, brushes
Day’s Goal: To paint/decorate the sculpture
If your sculpture is still not completely dry, you might need to run a few more oven cycles. It's essential to be absolutely certain it's dry before proceeding. If the sculpture is not totally dry, cracks may appear later and will be hard to fix without damaging the paint.
I strongly recommend priming your sculpture before painting. Allow it to dry thoroughly before applying paint. You will need to let the primer dry a bit before proceeding with your selected of media.
Acrylic paint is my preferred choice as it dries quickly and forms a nice seal on the clay as well (it essentially turns to plastic when dry). I rely on both heavy body and fluid acrylics, selecting based on the desired effects I am trying to create. Additionally, Holbein's Acryla Gouache paints offer splendid alternatives – they are acrylic-like but more like watercolours that create lovely effects. For beginners and those on a budget, student-quality acrylics are a practical and beginner-friendly option.
Resources you may find useful:
Why you should prime your air dry clay sculpture
One Week Later:
Varnish your sculpture once it's completely cured
The reason we wait so long to varnish is to ensure that any moisture is completely gone from the clay and paint. We do not want to “trap” anything there with the varnish.
Resources you may find useful:
All you need to know about varnishing air dry clay sculpture

If you’re looking for inspiration for an air dry clay project, check out my book "Creating Animals in Wire and Clay". The project outline above would be suited to something similar. Additionally, if you’re looking for more information and tips, see my other book "Sculpting Horses in Air Dry Clay". Or for other guidance and insights for aspiring sculptors, explore the rest of my blog. 😊
By following this weekend sculpting project plan, you can effectively break down the sculpting process into manageable steps, making it easier to find time for your creative pursuits. Remember that sculpting is not just about the finished piece, but the joy of the creative journey itself. Happy sculpting!
What's Next?
Explore the difference between Air Dry Clay vs Epoxy Clay
Discover the secrets of sculpting with Creative Paperclay